- 取得連結
- X
- 以電子郵件傳送
- 其他應用程式
架設好 Nuget Server 後,要來將撰寫好的類別庫檔案發佈到 Nuget Server 上。
要建立 nupkg 套件需先取得 Nuget 命令提示字元管理工具。
如何取得 Nuget 工具請參考此文章:上傳既有的 Nuget 套件到自行架設的 Nuget Server
本文章介紹透過 Nuget 工具將類別庫專案 (*.csproj) 打包成 Nuget 套件檔 (*.nupkg)
流程大致如下:
- 建立類別庫專案
- 建立 Nuget 套件設定檔
- 將類別庫專案打包成套件 (*.nupkg) 檔
- 將套件檔上傳到自行架設的 Nuget Server
Nuget Server 資訊
| 作業系統 | Windows Server 2016 Standard |
| IP位址 | 192.168.0.95 |
| 繫結網址 | nuget.txstudio.tw |
| ApiKey | txstudio |
| PackagesPath | ~/Packages |
建立要製作成套件的類別庫專案
此範例建立一個透過 Newtonsoft.Json 套件進行序列與反序列 JSON 的類別庫專案。
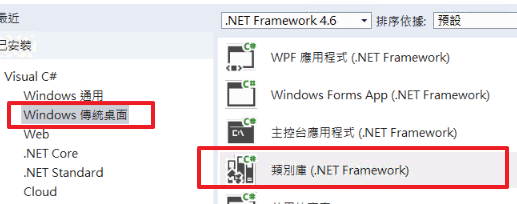
建立傳統類別庫專案。

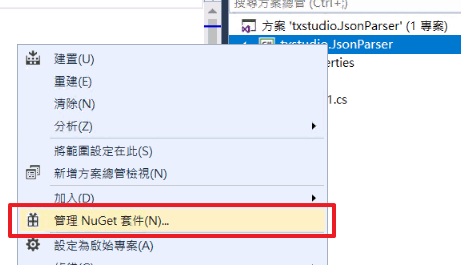
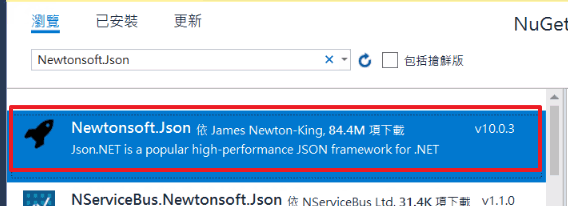
加入 Netwonsoft.Json 套件參考。
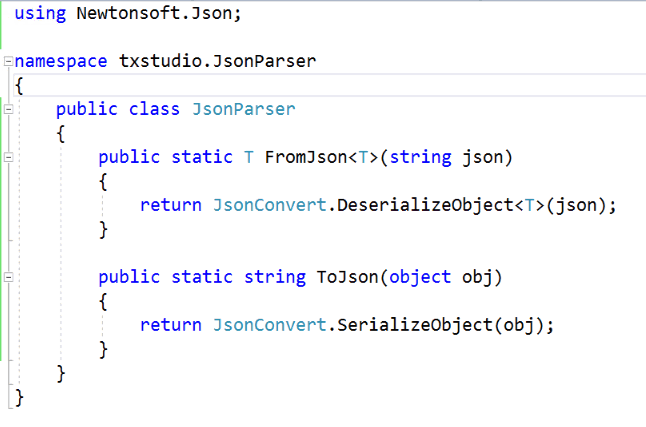
撰寫序列與反序列方法的程式碼區塊。
類別庫已經撰寫完成,接下來要進行 Nuget 套件的設定。
建立 Nuget 套件設定檔
在「命令提示字元」中切換到專案資料夾路徑。

執行 nuget spec 指令,請確認 nuget 工具的執行路徑。
nuget spec
執行完成後會建立 *.nuspec 檔案,使用文字編輯器開啟並設定套件要顯示的資訊。
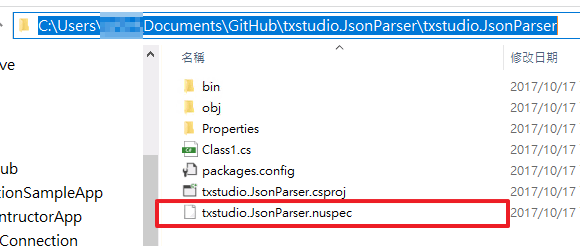
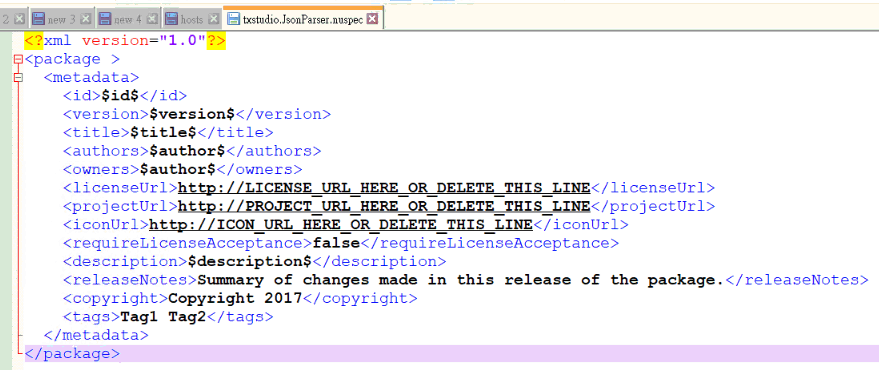
nuspec 檔案為 xml 內容,修改預設內容已符合套件資訊。
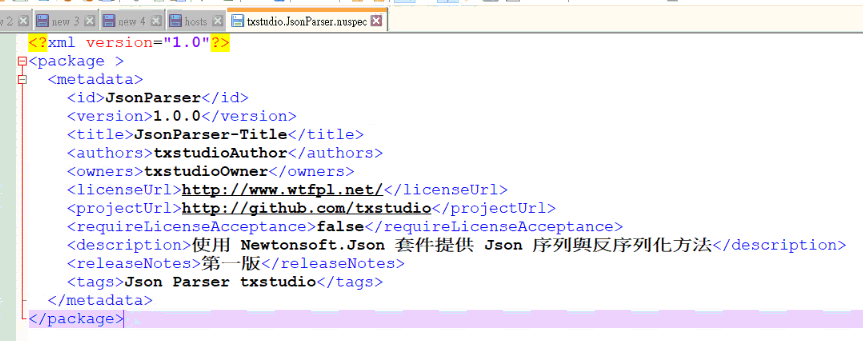
將類別庫打包成 Nuget 套件
因類別庫專案有參考到 Newtonsoft.Json 套件,打包過程中會一併加入相依性參考。
使用 nuget pack {project_file} 指令進行打包。
nuget pack txstudio.JsonParser.csproj
打包完成後資料夾底下就會出現 JsonParser.1.0.0.nupkg 的套件檔。
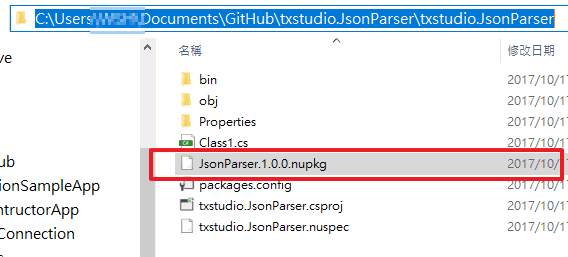
spec 指定項目並不支援 "-" 字元,打包時會出現錯誤。
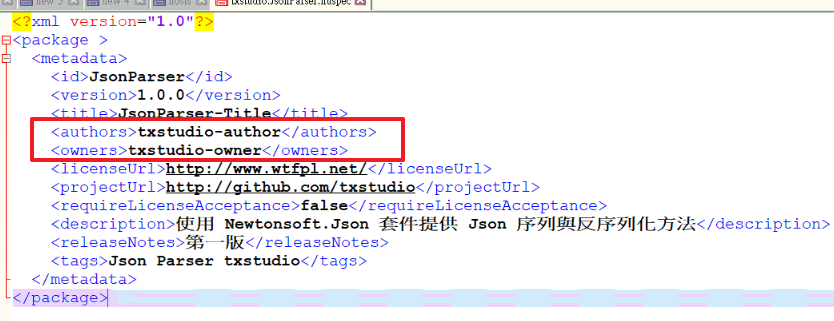

撰寫好類別庫後請記得編譯,不然也無法進行打包。

將打包後的套件上傳到 Nuget Server
接下來要將套件檔案上傳到自行架設的 Nuget Server。
在命令提示字元切換至上傳套件的資料夾,使用 nuget push {*.nupkg} {apikey} -src {url} 指令將套件進行上傳。
nuget push JsonParser.1.0.0.nupkg txstudio -src http://nuget.txstudio.tw
套件上傳成功後,就可以使用套件管理員進行驗證。
確認 Nuget Server 有剛上傳上去 Nuget 套件
在新的專案中開啟套件管理員,並切換來源為自行架設的 Nuget Server。

點選 JsonParser 套件並從詳細資訊中顯示 Newtonsoft.Json 相依性與一開始在 nuspec 設定的內容。
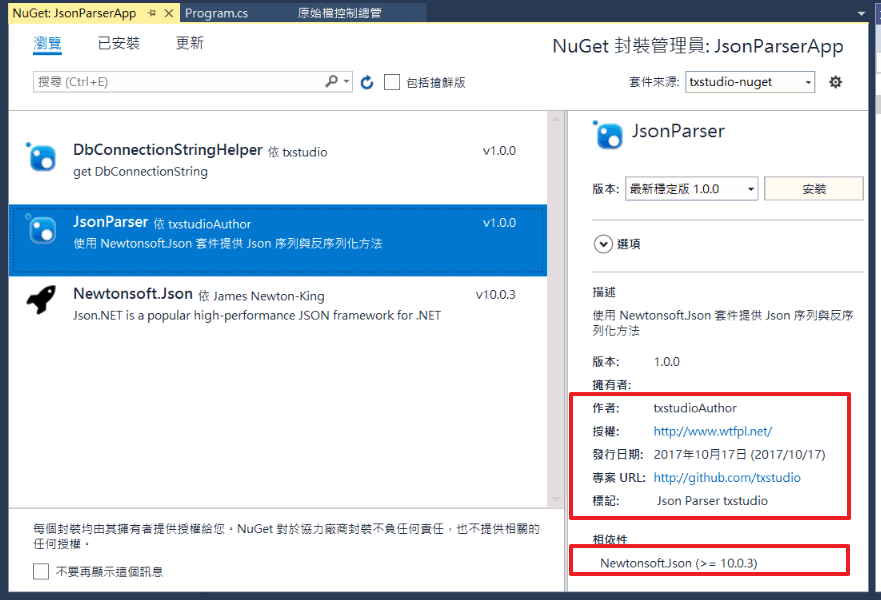
安裝完成後會一併安裝 JsonParser 與 Newtonsoft.Json 套件。

在此專案中就可以使用此套件進行程式碼撰寫。
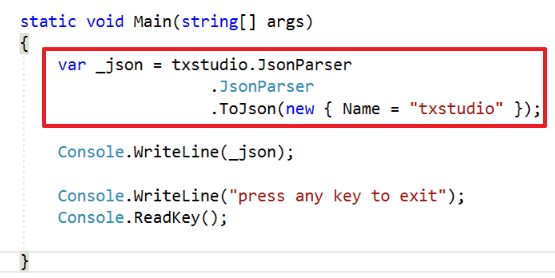

透過此方法可以將公司內部建立的共用類別庫專案發佈到公司內部的 Nuget Server,就不需要使用複製貼上的方式管理共用的程式碼。
留言
張貼留言